We make software for humans. Custom Mac, Windows, iOS and Android solutions in HyperCard, MetaCard, and RunRev LiveCode
Resources...
Converting a HyperCard stack to LiveCode
Importing the stack
Launch LiveCode. To open the stack in LiveCode, simply choose "Open stack" from the File menu and choose the Tech Support TimeSaver stack. Although we commonly use the word "convert" when referring to porting HyperCard stacks, in reality they are opened and read directly by LiveCode. No other "conversion" process is necessary.Fixing the Play error
If we had not previously commented it out, an error dialog with a "bad command" error would have occurred repeatedly when the idle handler executed. We will fix that handler now so it will work. Type Command-Shift-C to edit the script of the card. LiveCode supports the play command, and the sound resource it refers to was imported into the data fork of the new stack. However, LiveCode does not support playing specific notes with a sound resource, so that is where the error would occur.Uncomment the idle handler, and remove the notation parameters from the play command, leaving only the command itself:
If you forget to comment out other incompatible commands in your own imported stacks (such as calls to XCMDs,) LiveCode offers an extensive Find and Replace option under the Edit menu that will allow you to search the scripts of the entire stack and replace those calls with commented-out versions of the line. There are also Suppress Errors and Suppress Messages options under the Development menu that will turn off LiveCode's error dialogs until you turn them on again. This can save you some aggravation while you are making changes to incompatible scripts.on idle play "Tick.rev" pass idle end idle
To save the script, hit the Enter key or click the Compile button at the top of the editor.
This would be a good time to choose "Save" from the File menu and save the stack to disk. Unlike HyperCard, LiveCode does not save your work for you automatically; it works more like conventional applications. If anything should go wrong before you have saved the converted stack, all your work would be lost, so save frequently. Another advantage to saving immediately after importing is that the "Revert to Saved..." menu command will work if you later need to go back to a previously-saved version. Until the stack is saved to disk, there is nothing to revert to.
Setting the stack title
In LiveCode, a stack's name is different than its title. You can give a stack a name that is easy to type and refer to in scripts, while displaying a longer or more descriptive title in the title bar. A stack without an assigned title will display the stack's name in the title bar by default, followed by an asterisk and the number of the current card in parentheses. To remove the asterisk, just give the stack a title. (If you ever want to have a title bar with no title in it at all, use a space as the stack's title.)To add a title, choose "Stack Inspector" from the Object menu and type a title into the Label field. We used "Tech Support TimeSaver" as the stack label, and changed the stack name to "TSTS". That gives us a short name to refer to in scripts while leaving the more descriptive name in the stack's title bar. If you prefer, it is okay to use the same name for both.
To set the properties and return to the stack, click the close box in the Stack Properties window.
Setting the idle rate
Now that we've removed the notation from the "play" command, the ticking sound on the first card is erratic. We need another way to even out the pulse.LiveCode allows a script to set the idleRate property, which determines how often an idle message is sent. The number indicates a delay in milliseconds between idle messages and can be anything between 0 and 65535. We will use 800 to give us an even beat. Note that LiveCode supports the idle message for compatibility with HyperCard, but does not recommend its use. We will modify this script later in the Optimizing for LiveCode section of the tutorial, but for now, we will simply modify the idle handler to accomodate.
We will set the idleRate on openCard and set it back to default on closeCard. Open the script of the first card by pressing Cmd-Shift-C. Change the openCard handler and the closeCard handler to look like this (changes are marked in red):
on openCard
global gShowDialog
set the idleRate to 800
if gShowDialog is "Yes" then
put "No" into gShowDialog
-- play "Bell"
answer "This program is $5 shareware." & return & return & \
"NOTICE: Do not distribute this stack except in its original," \
&& "unaltered form as a HyperCard file. See the About card" && \
"for details." with "More Info" or "OK"
if it is "More Info" then
visual effect dissolve fast
go next card
end if
end if
pass openCard
end openCard
on idle
  play "Tick.rev"
  pass idle
end idle
on closeCard
play stop
set the idlerate to 60000
pass closeCard
end closeCard
You may notice that we have also commented out the play "Bell" command in the openCard handler. LiveCode has faithfully imported this sound along with the others, but it was probably saved originally in an incompatible format, most likely as a Mac-specific compressed sound. We have commented it out to prevent the noise that occurs when LiveCode tries to reproduce it. The fix is to delete the sound from LiveCode, re-sample the original in a sound editing program, save it in ".au" format (which is the most fully cross-platform, though you can use other formats if you like) and re-import it back into LiveCode via the "Import As Control" item under the File menu. For our purposes, we will leave this play command commented out.
If you leave the card and return, you will hear a steady ticking sound. If not, be sure the browse tool is selected. LiveCode does not send normal messages while the edit tool is active.
The "About" card
Adjusting the graphic and button
Either type the right arrow key on your keyboard, or click the "About" button on the title card to go to the next card. This card gives some information about the stack and its author, and serves as the stack's About box.Due to the way HyperCard stores some of its graphic information, the normally opaque graphic on this card has imported with some of its white space transparent. We will fix that by using the paint tools to re-fill the white area that is missing.
Choose "Paint Palette" from the Tools menu and click on the bucket tool in the resulting palette. Click the Color button on the tool bar and choose white from the color palette that appears. Click the point of the bucket tool in the main area of the graphic which should be white, and click again in the tiny, thin area between the two black borders. Use the rectangle tool to redraw the border lines if necessary. Since the default pen color is black, there's no need to choose a color for this tool. Close the Paint and Color Palettes.
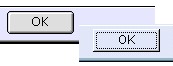
The shadow button in LiveCode is drawn somewhat differently than it is in HyperCard. Since shadow is not a common button style on most platforms, let's change this button to standard style. The standard button style takes on the colors and appearance of the current operating system automatically. On Macs, a standard button will look like a round-cornered Macintosh button with Appearance Manager colors and properties. On Windows, a standard button will take on the user-selected color scheme and will be drawn as a rectangle with a focus border, according to Windows guidelines. You do not need to manage the button's appearance between platforms if you use standard buttons; LiveCode will do it for you.
To set the button style, choose the edit tool from the Tools palette. Double-click the "OK" button on the About card. In the properties dialog that appears, click on the Button tab. Use the popup button to choose standard style. Close the button properties dialog and choose the browse tool from the Tools palette.
Save the stack to disk. The About card is done now, though we will return to it later in the Optimizing for LiveCode section of the tutorial.
It's time to move on to the main record-keeping section of the stack.